- Operation Fustian
-
Operation Fustian Part of Allied invasion of Sicily 
Primosole Bridge after capture, with damaged pill box on the rightDate 13–16 July 1943 Location Primosole Bridge, Catania
37°23′58.27″N 15°3′54.01″E / 37.3995194°N 15.0650028°EResult Operation failed and the bridge was eventually taken by the advancing Eighth Army Belligerents  United Kingdom
 Germany
 Italy
ItalyCommanders and leaders Brigadier Gerald Lathbury
Major-General Sidney KirkmanGeneral Richard Heidrich
General Carlo GottiUnits involved 1st Parachute Brigade
50th (Northumbrian) Infantry Division1st Fallschirmjäger Division
213 Coastal DivisionCasualties and losses 141 dead[nb 1]
168 missing or wounded
41 C-47 Dakota
1 Albemarle
5 Waco glidersUnknown Second World War British airborne forces operations1st Airborne Division
2nd Independent Parachute Brigade
Operation Biting · Operation Freshman · North Africa · Operation Turkey Buzzard · Operation Ladbroke · Operation Fustian · Operation Slapstick · Battle of Arnhem · Operation Doomsday
6th Airborne Division
Operation Deadstick · Operation Tonga · Battle of Merville Gun Battery · Operation Mallard · Battle of Bréville · Operation Varsity
Operation Hasty · Operation Rugby · Operation MannaOperation Fustian was a British airborne forces mission during the Allied invasion of Sicily in the Second World War. The operation was carried out by the 1st Parachute Brigade, part of the 1st Airborne Division. Their objective was the Primosole Bridge across the Simeto River. The intention was for the brigade, with glider-borne forces in support, to land on both sides of the river. They would then capture the bridge and secure the surrounding area until relieved by the advance of XIII Corps, which had landed on the south eastern coast three days previously. Because the bridge was the only crossing on the river, and would give the Eighth Army access to the Catania plain, its capture was expected to speed the advance and lead to the eventual defeat of the Axis forces in Sicily.
The operation encountered multiple obstacles and met heavy opposition. Many of the aircraft carrying the paratroopers from North Africa were shot down or were damaged and turned back, due to both friendly fire and enemy action. The evasive action taken by the pilots scattered the brigade over a large area, and only the equivalent of two companies of troops were landed in the correct locations. Despite this and the defence by German and Italian forces, the British paratroops captured the bridge. Resisting all attacks, they held out against increasing odds until nightfall.
The relieving force led by the 50th (Northumbrian) Infantry Division, which was short of transport, had their own problems trying to reach the parachute brigade and were still 1 mile (1.6 km) away when they halted for the night. By this time, with casualties mounting and supplies running short, the parachute brigade commander, Gerald Lathbury, had relinquished control of the bridge to the Germans. The following day the British units joined forces, and the 9th Battalion, Durham Light Infantry with armour support attempted to recapture the bridge. The bridge was not finally secured until three days after the start of the operation, when another battalion of the Durham Light Infantry, led by the paratroopers, established a bridgehead on the northern bank of the river.
The eventual capture of Primosole Bridge did not lead to the expected rapid advance, as by this time the Germans had gathered their forces and established a defensive line. It was not until early the following month that the Eighth Army captured Catania. By this time the 1st Parachute Brigade, which had taken no further part in the conquest of Sicily, had been withdrawn back to Malta. However, many lessons had been learned during the operation, which were put into practice for future Allied airborne operations.
Contents
Background
After the Axis powers were defeated in North Africa, the Allied armies' next logical objective was to cross the Mediterranean, landing in either the south of France, the Balkans, Sicily or Italy. The objective chosen was Sicily, with the landing scheduled for 10 July 1943.[1] The Allied 15th Army Group was commanded by General Harold Alexander. It consisted of the American Seventh Army, commanded by Lieutenant General George S. Patton, which would land in the west between Licata and Scoglitti,[1] and the veteran British Eighth Army, commanded by the experienced General Bernard Law Montgomery, which would land in the south east between Cape Passero and Syracuse.[2]
 Map of the July 1943 Allied landings
In addition to the seaborne landings, there were also airborne landings during the invasion. The American 82nd Airborne Division would land in support of the Seventh Army, while the British 1st Airborne Division conducted brigade-sized landings along the eastern coast to support the Eighth Army.[1]
The first British airborne landing was Operation Ladbroke, which was carried out by the 1st Airlanding Brigade during the night of 9–10 July. Their objective was to seize and hold the Ponte Grande bridge just outside Syracuse.[3] The second British airborne mission, Operation Glutton, was to have been undertaken by the 2nd Parachute Brigade on the night of 10–11 July, aiming to capture a bridge beside Augusta. However circumstances changed and the second operation was cancelled.[3]
The third British airborne mission planned was Operation Fustian, to be carried out by the 1st Parachute Brigade, and scheduled for the night of 13–14 July.[3] The 1st Parachute Brigade's objective was the Primosole bridge, crossing the Simeto River, south of Catania.[4] The bridge was a vital objective, as it was the only crossing point over the Simeto. Its capture would give the Eighth Army access to the Catania plain, to enable them to continue their advance northwards; its destruction would seriously hamper the advance.[5] Once the parachute brigade had captured the bridge, they would then have to defend it until relieved by units of the Eighth Army advancing from the landing beaches.[6][7]
British forces
The 1st Parachute Brigade was commanded by Brigadier Gerald Lathbury and comprised the 1st Parachute Battalion, the 2nd Parachute Battalion, the 3rd Parachute Battalion, the 16th (Parachute) Field Ambulance, the 1st (Parachute) Squadron Royal Engineers and the 1st (Airlanding) Anti-Tank Battery, Royal Artillery. The airlanding anti-tank battery were equipped with the Brigade's only anti-tank guns, the British 6 pounder. Despite the formation being a parachute brigade, the only way to transport the anti-tank guns and the jeeps required to pull them when they had landed, was by glider.[8] Transporting artillery by air was something new to the British or any other army, and this would be the first time that any artillery guns had ever been flown into combat.[9]
The 1st Parachute Brigade was an experienced formation, which had just taken part in the Operation Torch landings in Algeria and the subsequent Tunisian Campaign, during which each of the brigade's three parachute battalions had taken part in their own battalion-sized parachute landings.[10] It was during this campaign that the 1st Parachute Brigade had been given their nickname the Red Devils by the Germans.[11] A British parachute battalion had an establishment of 556 men in three rifle companies. Each of the companies were divided into a small headquarters and three platoons. The platoons had three sections; each section had a Bren machine gun and a 2-inch mortar as well as the men's own personal weapons.[12] The only heavy weapons in the parachute battalion were in the 3-inch Mortar platoon and the Vickers machine gun platoon which were part of the battalion headquarters.[13]
 British paratroopers, before taking part in a practice parachute jump in April 1944
It was decided that the brigade's paratroops would land on four separate drop zones and that the gliders would land at two landing zones. The paratroops of the 1st Parachute Battalion were divided into two groups, one of which would land at 'Drop zone One' to the north of the river, and the second at 'Drop zone Two' to the south of it.[14] Once they had landed the two groups would head for their assembly points, before conducting an assault on the bridge from both sides simultaneously.[5] The 2nd Parachute Battalion were to be landed south of the bridge on 'Drop zone Three', in the area between the Gornalunga Canal and the main highway.[14] The 2nd Battalion then had to assault and occupy three small hills, which had been given the codenames 'Johnny I', 'Johnny II' and 'Johnny III'. The hills were believed to be occupied by an Italian force of around platoon strength. Once the battalion had secured the three hills, they were to dig in and prepare to defend the hills against an attack from the south.[5][15] The 3rd Parachute Battalion would land at 'Drop zone Four', 1,000 yards (910 m) north of the bridge.[14] Their objective was to secure the ground in this area, defending against any counter attack from the direction of Catania.[15] The brigade's glider force had two landing areas, 'Landing zone Seven' north of the river and 'Landing zone Eight' south of the river.[14] Owing to the complexity of the landing plan and the short time between inception and execution, the pathfinders belonging to the 21st Independent Parachute Company, Army Air Corps, would be deployed to mark the correct drop zones. This was the first occasion this had been done in British airborne operations.[16] The pathfinder company had special marker lights and Rebecca and Eureka beacons that the transport aircraft and gliders would be able to identify and home in on.[17]
The senior officers of the 1st Airborne Division had estimated that there would be around 450 casualties during the capture of the bridge, of which 25 per cent would be killed or missing, and the other 75 per cent wounded.[8] It was appreciated that by themselves the three battalions' medical officers and staff would be unable to cope with the expected numbers of casualties, so one section from the 16th (Parachute) Field Ambulance, consisting of one doctor and 16 other ranks, would be attached to each of the parachute battalions. The remainder of the field ambulance, comprising the headquarters with two surgical teams, would be co-located with the brigade and establish their main dressing station in farm buildings to the south of the bridge.[18]
After problems with the first two airborne operations in Sicily, the Royal Air Force advisor assigned to the 1st Airborne Division suggested that the American C-47 pilots adopt the Royal Air Force bomber stream formation. This entailed the aircraft flying in pairs one behind the other with one minute between each aircraft, instead of flying in their normal 'V' formation.[16] The suggestion was dismissed by the American pilots, who were mostly pre-war airline pilots, not least because their training had not included any instruction in night time navigation and the inexperienced crews relied heavily on following the aircraft in front.[19]
Unconnected with Operation Fustian, but being conducted at the same time, the British No. 3 Commando would carry out a separate operation 8 miles (13 km) to the south of the Simeto River. The commando unit were to carry out an amphibious landing from the sea, then assault and capture the Malati Bridge over the Leonardo River.[15]
 Sicily 1943, British infantry with a Sherman tank to their rear
The relieving force for both the commandos and paratroopers would be from the British XIII Corps, commanded by Lieutenant-General Miles Dempsey. The corps consisted of the 5th Infantry Division, 50th (Northumbrian) Infantry Division and the 4th Armoured Brigade.[20] The armoured brigade, with three tank regiments, was equipped with the American built Sherman tank.[20] Early on 13 July the commander of the 50th (Northumbrian) Infantry Division, Major-General Sidney Kirkman, was called to General Montgomery's headquarters. Here he was informed about the two missions by the British Commandos and the 1st Parachute Brigade, and the requirement for the bridges to be captured intact. Montgomery's intention was for the 50th (Northumbrian) Infantry Division to lead the Eighth Army's advance and relieve the commandos and the paratroopers. To assist General Kirkman in the task, Montgomery placed the 4th Armoured Brigade under his command.[21] Montgomery was insistent that he wanted the infantry division to relieve the parachute brigade early on 14 July, which would require the division to advance around 25 miles (40 km) in 24 hours.[21] The 50th Division had landed on 10 July and by this time had been fighting for three days non-stop. With the daily temperature most of the time reaching 100 °F (38 °C), many of the men in the division were physically exhausted and suffering from heat exhaustion.[21] The division's situation was not improved by a grave error of judgement by Montgomery. During the planning for the invasion, he had over-estimated the strength of the German and Italian resistance to the Allied landings. The British Eighth Army consisted mainly of infantry, tanks and heavy weapons but were light on any form of mechanical transport, so any advance by the 50th Division would have to be conducted on foot.[22]
Axis forces
The Italian Army force in the area of Primosole Bridge came from the 213 Coastal Division commanded by General Carlo Gotti.[23] Coastal divisions were second line divisions, usually formed from men in their forties and fifties, and were intended to perform labouring or other second line duties. Recruited from the local population, their officers were mostly men who had retired but had then been called up again. Their morale was low, not least because of their second rate equipment and weapons. It had been intended to improve their armaments with equipment seized from the recently disbanded Vichy French army, but when the arms arrived in Sicily, many of them had been made unusable, and some had the wrong type of ammunition or no ammunition at all.[24]
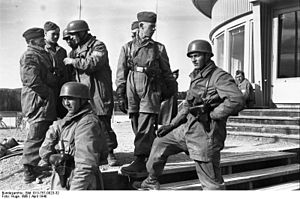 German paratroops of the Fallschirmjäger-Regiment 1
The Italians were supported by the German 1st Fallschirmjäger Division, who were ordered to move to Sicily from France, and if necessary were to parachute in on 9 July.[25] The 1st Fallschirmjäger Machine Gun Battalion commanded by Major Werner Schmidt had landed at Catania during an Allied air raid early on 13 July. Their aircraft and anti-tank guns were destroyed during the raid, so the battalion left on foot for Primosole Bridge.[15] When Schmidt informed the divisional commander of his intentions, he was warned to expect a sea or airborne landing that night. If the Allies landed to the rear of the Fallschirmjäger division, Schmidt's battalion had to hold Primosole Bridge so that the division could escape.[26] Forewarned in this way, the machine gun battalion started to dig in and prepare a defence around 2,000 yards (1,800 m) to the south of the bridge once they arrived, well located to deal with any parachute or glider landing in that area.[27]
Primosole Bridge
The Primosole Bridge is built from steel girders. It has a span of 400 feet (120 m), and is raised 8 feet (2.4 m) above the Simeto River. The land to the north of the bridge is mainly olive and almond groves in tree-lined fields. Immediately to the south of the bridge is the Gornalunga canal, and beyond that three prominent hills.[15] The road crossing the bridge is Highway 114, running from Lentini 10 miles (16 km) to the south to Cantini 7 miles (11 km) to the north.[14] To assist the Italians defending the bridge, four pillbox bunkers had been constructed, two on the north bank and two on the south bank.[28]
Fustian
At 19:30 on 12 July 1943, the first aircraft carrying the 1,856 men of the 1st Parachute Brigade took off from North Africa.[18][29] The aircraft used consisted of 105 C-47 Dakotas belonging to the 51st Troop Carrier Wing, 51 each from the 60th and the 62d Troop Carrier Groups, while the 64th Troop Carrier Group supplied the other three. No. 38 Wing Royal Air Force supplied eleven Armstrong Whitworth Albemarles.[30] Following behind the parachute force were the glider towing aircraft. These aircraft, again supplied by No. 38 Wing, comprised 12 Albemarles and seven Handley Page Halifaxes, towing 11 Horsa gliders and eight Waco gliders. The gliders were used to carry 77 men, mostly from the anti-tank battery, ten 6 pounder anti-tank guns and 18 jeeps.[30]
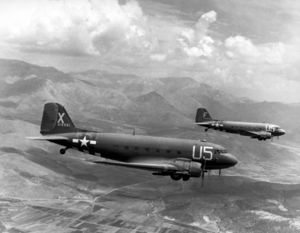 A pair of C-47 Dakotas, similar to the 105 C-47s used in the operation
The aircrafts' flight path took them around the south eastern corner of Malta and up the eastern coast of Sicily.[30] The route was measured to ensure that the first planes arrived over the drop zones at 22:20.[18] When the planes arrived off Sicily, they were supposed to stay 10 miles (16 km) offshore until reaching the Simeto River, when they would head inland for the drop zones.[31] Somehow, 33 aircraft strayed off course and approached an Allied convoy. The naval gunners had been warned to expect an air raid, and opened fire on the American and British aircraft.[31] Two of the planes, trying to avoid the unexpected anti-aircraft fire, collided and crashed into the sea.[31] Another two were shot down, and nine were so badly shot up, with wounded crew and passengers, that they were forced to turn back towards their airfields in North Africa.[5]
Those aircraft that did reach the Sicilian coast were engaged by Axis anti-aircraft guns, which shot down 37 of them. Another ten were damaged and were forced to abort their mission.[5] Some of the inexperienced pilots now refused to go any further, and on his aircraft Lieutenant Colonel Alastair Pearson, commander of the 1st Parachute Battalion, realising his plane was flying round in circles, had to threaten to shoot the crew to make them continue.[19] The anti-aircraft fire and the evasive action taken by the pilots had dispersed the aircraft formations, and the parachute drop was scattered over a large area.[32] The violent evasive manoeuvring left some of the paratroopers in heaps on the aircraft floor, and they were unable to jump when ordered. When safely back out to sea, some of the pilots refused to try again, considering the risk too great.[33] Of the surviving aircraft which carried on with the mission, only 39 managed to drop their paratroops within .5 miles (0.80 km) of the correct drop zone.[19] The furthest off course were some groups from the 3rd Parachute Battalion and Royal Engineers who landed 12 miles (19 km) to the south of the bridge,[32] while another four aircraft landed their paratroops on the slopes of Mount Etna 20 miles (32 km) to the north.[17]
Those men of the 1st Parachute Brigade that landed on the southern drop zone were well within range of the 1st Fallschirmjäger Machine Gun Battalion. In the darkness, the Germans initially thought that the paratroopers were their own reinforcements landing, but they soon realised their mistake and opened fire.[27] Some of those who escaped the machine gun fire were rounded up on the drop zone, and about 100 of them became prisoners of war as soon as they had touched ground.[23][nb 2] In the confusion of the landing, 50 men of the 1st Parachute Battalion had assembled, assaulted and managed to capture the bridge before the 50 Italian defenders could destroy it with the attached demolition charges. The Italians were taken prisoner, just as a second group of 40 paratroopers led by Brigadier Lathbury arrived at the bridge. Lathbury organised the safe removal of the demolition charges and set up a defensive perimeter. More paratroopers continued to gather at the bridge, and soon they numbered around 120 men, who dug in to the north and south.[23]
The Brigade Headquarters and the field ambulance main dressing station were established to the south of the bridge, where the brigade's casualties started arriving for treatment.[32] Away from the main dressing station, the medics on the 2nd Battalion drop zone had 29 wounded as a result of the parachute drop, and there were 15 wounded on drop zone one from the 1st Battalion.[34]
 British paratroopers advance in line abreast
The first glider casualties had occurred on take off, when two aircraft towing Waco gliders crashed.[31] While on route, one of the gliders was released early by its towing aircraft, and crashed into the sea. When they did arrive over Sicily, the element of surprise was gone, and four gliders were shot down by the coastal anti-aircraft batteries.[31] By the time the gliders arrived at their landing zones, two hours had lapsed since the parachute landings had started.[15] One glider pilot later commented that they did not need the pathfinders, as the tracer and lights from explosions were brighter than any of the landing markers.[31] Of the surviving glider force, only four gliders managed to land relatively unscathed, all the others being caught by the Fallschirmjäger machine gun fire and destroyed on their approach. The four intact gliders had been carrying three of the anti-tank guns, which were now included in the bridge's defences.[5][35] Including the men from the gliders, the 1st Parachute Brigade had 295 men at the bridge.[35] Shortage of manpower was not their only problem; their only support weapons were the anti-tank guns, two 3-inch mortars and a Vickers machine gun.[5]
Daybreak
By 04:30 on 14 July, the 1st Parachute Battalion was in control of Primosole Bridge, but the Fallschirmjäger Machine Gun Battalion were well dug in to the south.[36] Beyond them, 140 men of the 2nd Parachute Battalion had occupied the three small hills, and taken 500 Italian prisoners.[37] In numbers, both battalions had little more than company strength. The 3rd Parachute Battalion had suffered the worst in the scattered parachute drop, and only a few of their men had arrived at the bridge. With no command structure, they were attached to the 1st Parachute Battalion to help defend the bridge.[38] To the north, the Italian 372nd Coastal Battalion and the Blackshirt Arditi Battalion had been informed of the parachute landings. Many of the 372nd Battalion had disappeared, while the Blackshirts mounted the first of a number of attacks on the British positions. Without the support of any heavy weapons, they were easily fought off.[36]
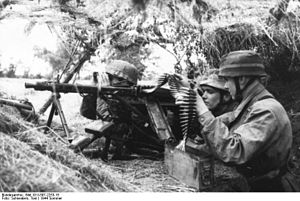 Fallschirmjäger with MG 42 machine gun
Also at dawn the first attack by the Fallschirmjäger Machine Gun Battalion to the south began, when they opened fire with their machine guns and mortars. Their first assault was against the 2nd Parachute Battalion's positions, and was unsuccessful. However, their next assault, later in the morning, succeeded in capturing Johnny II, the second of the small hills. Lieutenant-Colonel John Frost, in command of the 2nd Parachute Battalion, immediately counter attacked, but his men were repulsed after sustaining a number of casualties.[36] At 09:00 a forward observation officer attached to the 2nd Parachute Battalion managed to make radio contact with the British cruiser HMS Newfoundland, which then used its 6-inch guns to target the Fallschirmjäger positions.[36] The naval gunfire had the desired effect, causing the Germans some casualties and keeping them under cover. From then on, German resistance from the south was restricted to harassing machine gun fire. A grass fire they started did force the 2nd Parachute Battalion to abandon Johnny I, and the remnants of the battalion now concentrated on Johnny III.[39]
To the north of the bridge, a German battle group of 350 men, including the 1st Company, 1st Fallschirmjäger Signal Battalion, an anti-aircraft battery and some anti-tank guns, was gathered under the command of Captain Franz Strangenberg. Strangenberg was in position to launch his first assault on the bridge at 14:00. This first attack was driven off by the British paratroopers.[39] For his second attempt Strangenberg brought up three 88 mm anti-aircraft guns in support. This assault was more successful, taking some prisoners, and almost succeeded in reaching the bridge. It also secured a position for the 88s to engage the two pillboxes on the north bank.[39] By 17:00 the men of the 1st Parachute Battalion were almost out of ammunition, and were forced to withdraw to the southern side of the bridge.[36] The German 88s were moved forward again, and this time demolished the pillboxes on the south side. Running short of supplies and with his casualties mounting, Brigadier Lathbury made the decision to relinquish control of the bridge to the Germans, and the parachute brigade moved back 1,200 yards (1,100 m). Of the 295 men who had been at the bridge, 115 had become casualties.[36] The 16th (Parachute) Field Ambulance main dressing station could not be moved or evacuated, and remained behind in no man's land.[40]
An Italian officer entered the station, and informed the medical staff they were now prisoners of war. But since they were treating casualties from both sides, they were allowed to remain and continue operating.[2] Treatment of the wounded continued all day, and by 22:00 the surgeons had carried out 21 surgical operations and were looking after 62 British and 29 German or Italian patients.[40] At 18:30, in the darkness, Lathbury led the remainder of his men to join the 2nd Parachute Battalion.[41]
By dawn, the 50th (Northumbrian) Infantry Division had only managed to advance 10 miles (16 km), and were still 8 miles (13 km) from No. 3 Commando at the Melati bridge and 15 miles (24 km) from Primosole Bridge.[42] It was not until 17:00 that the 5th Battalion, East Yorkshire Regiment, part of the 69th Infantry Brigade, eventually reached Malati Bridge, although by now the commandos had been forced to withdraw.[43] The bridge was quickly captured; the commandos had dismantled the demolition charges so that it could not be demolished. With their first objective secured, the British infantry continued their advance on foot towards the parachute brigade.[42] The tanks and small amount of motor transport belonging to the 4th Armoured Brigade had been held up even further back. They had been stopped in Carlentini by a destroyed bridge, and the 4th Armoured Brigade did not start moving again until after 19:00.[42]
The 50th (Northumbrian) Division eventually reached Lentini, about half way from their start point to Primosole Bridge, in the afternoon. Here the streets were blocked by debris, covered by snipers and machine gunners left as a rearguard by the retreating Germans.[36] By nightfall only one of the 50th (Northumbrian) Division's infantry battalions, the 6th Durham Light Infantry, with some tanks in support, had reached a position 1 mile (1.6 km) from Johnny II. Despite their orders to advance at all speed, they halted for the night.[44]
Recapture of the bridge
After the parachute brigade withdrew, the Axis forces gathered at the bridge. They now comprised the Italian 372nd Coastal Battalion and the Blackshirt Arditi Battalion, with the German 1st Fallschirmjäger Machine Gun Battalion and Captain Stangenberg's Battle group. The German High Command was aware of the importance of holding the bridge, and overnight they dispatched reinforcements who arrived by parachute. These came from the 1st Fallschirmjäger Division, and consisted of the 1st Fallschirmjäger Engineer Battalion, the 1st Battalion, 4th Fallschirmjäger Regiment and a battalion of the 1st Fallschirmjäger Artillery Regiment.[41][45] The Fallschirmjäger engineers started to form a defensive line to the north of the bridge, and a smaller one on the southern bank.[41]
 Royal Engineers repairing the bridge after it was captured by the British for the second time
Early on 15 July, the 1st Parachute Brigade heard tank fire to the south of their position. Brigadier Lathbury sent out a patrol to investigate, which located the tanks and infantry of XIII Corps that had halted just south of them the previous night.[44] The 1st Parachute Brigade and 50th (Northumbrian) Division now moved forward together. The main dressing station, which had continued to operate after being captured, was liberated by the 2nd Parachute Battalion.[2] In an attempt to recapture Primosole Bridge the 9th Battalion, Durham Light Infantry, supported by the 44th Royal Tank Regiment, carried out a number of assaults. At one stage they managed to cross the bridge, but three Sherman tanks accompanying them were knocked out by the German 88s, and with no armoured support the infantry were forced to withdraw. However, an error in communication caused the Fallschirmjäger Engineer Battalion to withdraw to the north bank of the river, and this allowed the Durhams to establish a position at the southern end of the bridge.[41] At the main dressing station the surgeons had operated on another 14 wounded by the time ambulances arrived from XIII Corps at 17:00 to evacuate the wounded.[2] At 18:00 the Main Dressing Station was closed and the men moved to Johnny I. During the time the main dressing station had been active, the surgeons had completed 31 operations, and the medics had treated 109 wounded.[46]
The Germans were aware that the British paratroopers had dismantled the explosive charges attached to Primosole Bridge, and now attempted to destroy it by driving trucks laden with explosives onto it. This was unsuccessful.[47]
During the night the 9th Battalion, Durham Light Infantry continued trying to capture the bridge. Their attacks also provided a distraction for the Germans[2] while Lieutenant-Colonel Pearson of the 1st Parachute Battalion led two companies of the 8th Battalion, Durham Light Infantry across the Simeto River using a small ford to establish another bridgehead on the northern bank. During the day's battle both the British and Germans suffered heavy casualties, but the bridge was eventually retaken by the British infantry.[41]
Leaving Eighth Army to continue their advance, at 07:00 16 July the 1st Parachute Brigade were transported in trucks to Syracuse, where they embarked on a Landing Ship Tank. Here they remained overnight, sitting through a two hour air raid, and sailed for Valetta at 12:00 on 17 July.[2] In Operation Fustain they had suffered around 141 dead, and 168 missing or wounded.[5][48][nb 3]
Aftermath
The recapture of Primosole Bridge did not result in the rapid advance over the Catania plain envisioned by Montgomery. The by now exhausted 50th (Northumbrian) Infantry Division was holding a position based on the bridge. The 5th Infantry Division took over the lead, but after a number of attacks could not make any further progress. Its 13th Infantry Brigade had to establish another bridgehead across the Simeto,[49] but the Germans had brought in more troops and prepared defensive positions, and after hard fighting it was not until 5 August 1943 that the Eighth Army entered the city of Catania itself.[44] Further hard fighting followed, and they entered Messina just after the American Seventh Army on 17 August 1943.[5]
After an enquiry into the problems with the airborne missions in Sicily, the British Army and Royal Air Force submitted some recommendations.[50] Aircrew had to be trained in parachute and glider operations, and pathfinders landing before the main force had to have enough time to set out their beacons.[50] The landing plan was simplified, with complete brigades landing on one drop zone, instead of the smaller battalion landing areas used in Sicily.[50] Gliders were no longer released at night while still over water, and their landing zones would be large enough to accommodate the aircraft with room to spare.[51] Following the friendly fire incident over the convoy, more training was given to ships' crews in aircraft recognition, and Allied aircraft were painted with three large white stripes on their wings.[52] Training for pilots belonging to the Glider Pilot Regiment was increased, and improvements to the gliders were implemented, including better inter-aircraft communication.[53]
For transporting paratroops, to avoid relying solely on American aircraft and pilots, No. 38 Wing Royal Air Force was expanded, becoming No. 38 Group with its Halifax squadrons, now supported by four squadrons of Albemarles and four squadrons of Stirlings.[54] To provide another method of delivering jeeps and artillery guns by air, the air force started experiments on parachuting them into combat, carrying the jeeps and guns in the aircrafts' large bomb bays.[54] A second Royal Air Force transport group, No. 46 Group, was formed, and was equipped solely with C-47 Dakotas, instead of the mixture of aircraft in No. 38 Group.[55] After these changes, the Royal Air Force groups could supply 88 Albermarles, 88 Stirlings, 36 Halifaxes and 150 Dakotas, a total of 362 planes, in addition to aircraft held as reserves.[55][nb 4]
Notes
- Footnotes
- ^ The troop casualties for the parachute brigade only, the aircrew losses are not known.
- ^ It is noteworthy that the British paratroopers caught in the branches of the fruit trees, were not killed out of hand, but were allowed to surrender.[23]
- ^ Reynolds only gives the total casualties for 1st Airborne Division in Sicily, while Mitcham only gives the casualties during Operation Ladbroke. This casualty figure has been achieved by subtracting one figure from the other.
- ^ Although an improvement on what went before, the total of 362 is only a fraction of the 1,166 C-47s in the American transport fleet.[55] The lack of transport aircraft hampered every British airborne operation of the war. However since 1941, following an Air Ministry order, all Royal Air Force bombers had equipment fitted to tow gliders, and Albemarle, Halifax and Stirling bombers were able to conduct parachute operations. It was the Commander-in-Chief Bomber Command Arthur Harris, who refused to divert aircraft from the strategic bombing campaign, to transport troops.[56]
- Citations
- ^ a b c Tugwell, p.156
- ^ a b c d e f Cole, p.49
- ^ a b c Reynolds, p.36
- ^ Tugwell, p.159
- ^ a b c d e f g h i Reynolds, p.37
- ^ Tugwell, p.162
- ^ Reynolds, p.47
- ^ a b Cole, p.35
- ^ Carman, p.23
- ^ Reynolds, pp.30–32
- ^ Reynolds, p.34
- ^ Guard, p.37
- ^ Peters and Buist, p.55
- ^ a b c d e Mrazek, p.83
- ^ a b c d e f Mitcham, p.150
- ^ a b Tugwell, p.163
- ^ a b Ferguson, p.12
- ^ a b c Cole, p.45
- ^ a b c Tugwell, p.164
- ^ a b Mitcham, p.335
- ^ a b c Mitcham, p.154
- ^ Mitcham, p.82
- ^ a b c d Mitcham, p.152
- ^ Jowett, p.6
- ^ Mitcham, p.72
- ^ Mitcham, pp.150–151
- ^ a b Mitcham, p.151
- ^ Mitcham, pp.157–158
- ^ Mitcham, p.148
- ^ a b c Mrazek, p.82
- ^ a b c d e f Mrazek, p.84
- ^ a b c Cole, p.47
- ^ Cole, p.46
- ^ Cole, pp.47–48
- ^ a b Mitcham, p.153
- ^ a b c d e f g Mitcham, p.156
- ^ D'Este, p.363
- ^ Mitcham, p.158
- ^ a b c Mitcham, p.157
- ^ a b Cole, p.48
- ^ a b c d e Quarrie, p.77
- ^ a b c Mitcham, p.155
- ^ D'Este, p.360
- ^ a b c Tugwell, p.165
- ^ Mitchum, p.159
- ^ Cole, p.50
- ^ D'Este, p.392
- ^ Mitcham, p.78
- ^ D'Este, p.404
- ^ a b c Tugwell, p.167
- ^ Mrazek, p.85
- ^ Nigl, p.68
- ^ Nigl, p.69
- ^ a b Lake, p.81
- ^ a b c Tugwell, p.202
- ^ Tugwell, pp.136–137
References
- Carman, W. Y (1973). The Royal Artillery. Oxford, UK: Osprey Publishing. ISBN 085045140X.
- Cole, Howard N (1963). On Wings of Healing: the Story of the Airborne Medical Services 1940–1960. Edinburgh: William Blackwood. OCLC 29847628.
- D'Este, Carlo (1988). Bitter Victory: the Battle for Sicily, July–August 1943. London: Collins. ISBN 000217409X.
- Ferguson, Gregor (1984). The Paras 1940–84. Volume 1 of Elite series. Oxford, UK: Osprey Publishing. ISBN 0-85045-573-1.
- Guard, Julie (2007). Airborne: World War II Paratroopers in Combat. Oxford, UK: Osprey Publishing. ISBN 1846031966.
- Jowett, Philip S. (2001). The Italian Army 1940–45 (3): Italy 1943–45. Men at arms. Volume 3 of The Italian Army, 1940–45. Oxford, UK: Osprey Publishing. ISBN 1855328666.
- Lake, Jon (1999). Halifax Squadrons of World War 2. Volume 14 of Osprey Combat Aircraft. Oxford, UK: Osprey Publishing. ISBN 1855328925.
- Mitcham, Samuel W; Von Stauffenberg, Friedrich (2007). The Battle of Sicily: How the Allies Lost Their Chance for Total Victory. Military History Series. Mechanicsburg, Pennsylvania: Stackpole Books. ISBN 081173403X.
- Mrazek, James (2011). Airborne Combat: Axis and Allied Glider Operations in World War II. Military History Series. Mechanicsburg, Pennsylvania: Stackpole Books. ISBN 081170808X.
- Nigl, Alfred J (2007). Silent Wings Savage Death. Santa Anna, California: Graphic Publishers. ISBN 1882824318.
- Peters, Mike; Luuk, Buist (2009). Glider Pilots at Arnhem. Barnsley, UK: Pen & Sword Books. ISBN 1844157636.
- Quarrie, Bruce (2005). German Airborne Divisions: Mediterranean Theatre 1942–45. Volume 15 of Battle Orders. Oxford, UK: Osprey Publishing. ISBN 1841768286.
- Reynolds, David (1998). Paras: An Illustrated History of Britain's Airborne Forces. Stroud, UK: Sutton Publishing. ISBN 0750920599.
- Tugwell, Maurice (1971). Airborne to Battle: A History of Airborne Warfare, 1918–1971. London: Kimber. ISBN 0718302621.
External links
Categories:- Airborne warfare
- Allied invasion of Sicily
- Battles and operations of World War II involving Germany
- Battles and operations of World War II involving the United Kingdom
- Battles and operations of World War II involving Italy
- Parachute Regiment (United Kingdom)
- Glider Pilot Regiment operations


Wikimedia Foundation. 2010.